Sunday, April 20, 2014

Confetti Eggs

Have you seen the confetti eggs on Pinterest? I started noticing my friends pinning them just the past couple of weeks. I don't know how people save their eggs and then fill them with confetti. That is so time consuming. I think I would cry watching them being broken if I had put so much time into something like this. So imagine my joy when I walked into Walgreens and someone had already made the confetti eggs for me. I just want to say "thank you" to the person who took the time to make confetti eggs and let me buy them. I am here to say to all the moms who may have made their own confetti eggs, give yourself a break and go buy them and spend the time with your kids. I know you'll thank me later.


 And it was all over in 10mins. I enjoyed every minute and so did my kids. Happy Easter!


Tuesday, April 15, 2014

Lucky Charms

I bought another kit to test and try out with my kids. I like kits because they come with everything you need and I am not running around town trying to gather forgotten materials.
Last night my kids and I decided to make some clay charms together. When I saw this, it reminded me of the charms that my girls have on their charm bracelets. The charms aren't cheap, but I thought with this kit maybe I could save some money on the charms I've purchased at the mall (I am not holding my breath on the saving the money part).


Here is what the kit looks like. It is put out by Klutz and includes everything you need, including a book that shows you how to make their charms. When I opened up the clay it was really dry and it crumbled easily. I kind of wonder if it wasn't just old clay. I decided to by some different clay at the craft store instead. 


I like the Sculpey brand. I used to play with this stuff about 15 years ago and it has never disappointed me. I bought a bunch of different colors just so we weren't limited by what we could make.


Here is a mickey mouse charm I made and baked. It took 20 mins in the oven before it was fully done. The little metal hook came in the kit and I inserted it into the charm before baking.


Here is some of our creations from last night. We didn't put the glaze on our charms yet. The glaze is a nice touch but I think the flat finish of the clay is just as nice.


Overall I think my kids enjoyed making their own charms. I would buy this kit again. I like all of the things in the kit except for the dry clay that came in the box. If I could buy a kit with better clay than I wouldn't have any complaints. 

Thursday, April 3, 2014

Rubber bands

Ok, I have to admit that I didn't realize what a craze making rubber band creations on a loom would be. My kids spend hours finding new projects online and making them. I wish I would have thought of making a rubber band loom, but I am glad we have one for our kids. Sophie actually got a rubber band loom for christmas and was kind of (how should I say this)…unimpressed. I showed her what to do and as soon as we had made a basic bracelet she was happy as a clam. I wouldn't recommend this product for little kids because the small rubber bands could be a potential choking hazard and requires some patience. I have noticed some people online ranting about how the rubber bands break and that the projects never turn out. I have something to say about this….as long as you stay calm and keep on looming your band project will work out. My kids like the youtube videos that teach you as you go. I have to say that they are usually really good about explaining how to make things in simple terms.


Here is what the loom looks like. You can buy it at any craft store, online, or any major retail store. I actually bought this one on amazon. Most kits include the loom, hook, rubber bands, with c clips or s clips that hook your bands together. When you run out of rubber bands there are tons of different colors and packages at all the stores mentioned above. 


Sophie made a simple chain necklace. She plans on putting some charms on it. 


These are sunburst bracelets. the pastel colored one is made with glow in the dark rubber bands.  A tutorial for this is on youtube. 


My son made a snake and hooked it onto his backpack for school. His friends all want him to make them one.

Those are just some of the projects that my kids have done. I'm impressed that they like it so much (including my son). I would highly recommend buying one for your child if you don't already have one.

Wednesday, March 26, 2014

Kid Art

We started framing the artwork that came home from school about a year ago. Our fridge was always covered with all of these pictures my kids would color and they were constantly falling off the fridge. One day I was at a friends house and all of the art work that was in her kid's rooms were their own. I was so impressed. She then told me that framing your children's artwork helps to improve their self esteem. I wanted to find out if that was true or not. I went home and  searched on the web and sure enough I found dozens of articles that supported her claim. If you don't believe me, you should google kid's art and improve self esteem. You'll be surprised what comes up. 

Right away I wanted to do this with my kids. My husband thought it was a great idea, but we just had to find the time to get frames. We found a frame for each one of my kids at Hobby Lobby. What makes this frame so unique is that it opens and you can easily slide different pictures in and out. Whenever my kids come home from school with new art, this frame allows them to slip it into the frame themselves (my kids are old enough to do this…I wouldn't recommend wee children taking this on). 


Here is an example of my daughters framed artwork (I believe it is the water cycle).


My favorite part is the fact that it is so easy to open and there is a little pocket to store other art inside. 


I can't tell you how many times my kids have come home, telling me they have something to put in their picture frame. We hang the frames by the stairs so every time they go up and down them they see their pictures. Not only is some of the clutter off of the fridge but it is fun to have frequently changing artwork.

Wednesday, March 12, 2014

Fairy Garden

Since spring is in the air, I thought it would be fun to do a fairy garden with my twins. First, I started out googling what kinds of gardens other people had done before I made a list of supplies I would need to get. Once I had my vision of what I wanted it to look like, I went to Hobby Lobby for the decorations and I found my plants at the grocery store (which is really ironic).


 I found a birdhouse at Hobby Lobby but I stained it, put sticks on the roof, and glued a little moss on it. The goal was to make it look more nature-like. 


 These little items I found with all of the dollhouse supplies (so exciting and cute).


 I wanted the majority of this garden to be small plants even though I did buy a few primroses for color.


 I thought this plant was perfect because it is so tiny and dainty (it is called "baby tears").


 Some more tiny flowers.


 I just couldn't resist this color…isn't it amazing?


 Kelsey is making holes for the different plants (I ended up splitting some of the plants in half so we could fit more variety all around the little house).


 Sophie is covering all the plants with dirt and making sure there are no roots exposed.


 Here is our finished product! There is a pebble trail, wheelbarrow, and a lovely sitting bench.


Here is a close up. 


 I feel that this all came together nicely. My girls and I enjoyed figuring out what pieces and flowers should go where. I am excited to see how it looks when the plants start to grow and fill the pot.


 The twins are very proud of their work. Since we built this together I told them it was going to be their responsibility to water the "fairy garden". Hopefully this will teach them a lot about caring for plants.


Of course this project would have not been complete without some serious "sisterly love"!


Wednesday, March 5, 2014

Restaurant


Pretending is such an easy way to get your kiddos to help out and to be able to teach them valuable life skills. This week we decided to play "restaurant". I am sure many kids everywhere have played this imaginary game. I wanted to take this activity a little further. For the first part of this I had my kids go grocery shopping with me. You can't play restaurant and not have good food. We had discussed previously to going to the grocery store what would be a simple meal to make (hot pockets). While we were there, they picked out all of the produce and groceries for this meal in addition to the other groceries for the week. I had them pick out what looked good (I told them what to look for) and put it in the cart. When we checked out, they put everything on the conveyer belt and unloaded the groceries from the car when we got home. Even though I didn't take any pictures of this, they wanted me to blog about how much "behind the scenes" work they did. 

Now for the second part of "restaurant".

The most diplomatic way of assigning jobs was to have my kids to draw what they were going to do out of a hat. (You may want to do it differently depending on your kids and their ages. This is what worked for our family.) 


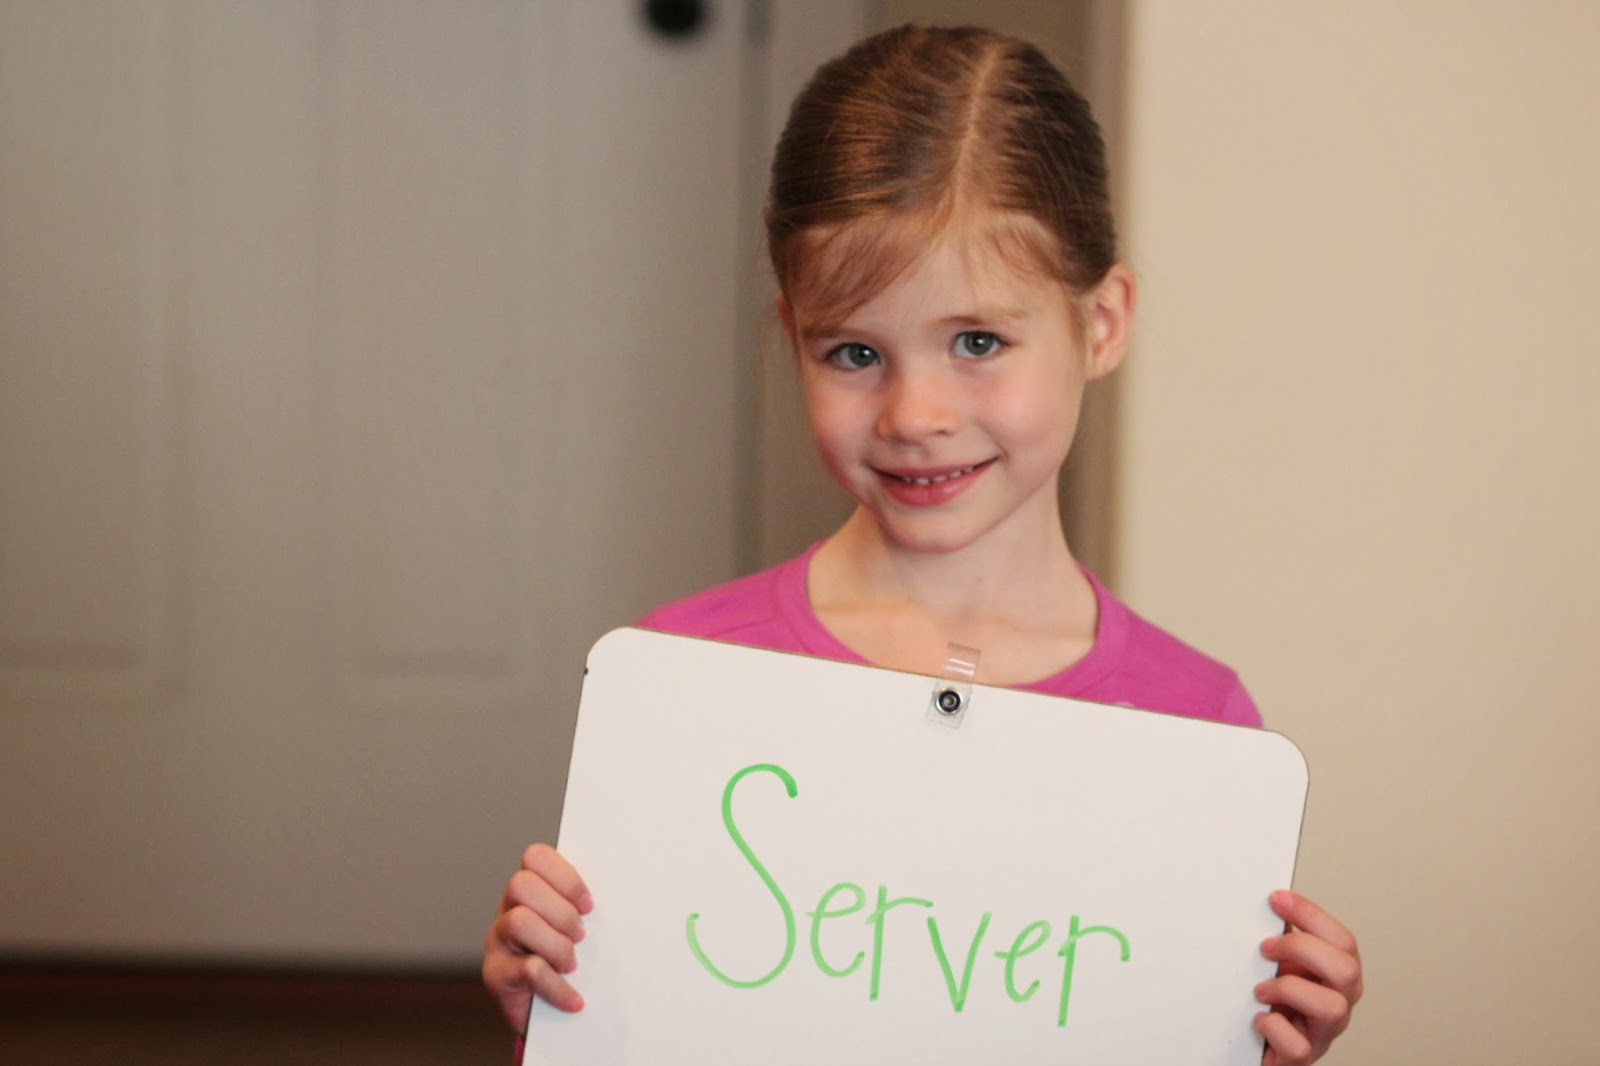
Kelsey was the server and menu maker


Porter actually should have been setting the table but traded with Sophie. He is the chef.


Sophie is the buss girl but didn't like the sound of that so we changed it to dish girl. She was in charge of setting and clearing the table. 


Sophie got right to work setting the table. 


She also rolled the forks in a napkin (so it would be more "fancy").

Kelsey created the menu.


The menu for tonight is:
Hot pockets (made from crescent rolls) with ham or cheese
Broccoli
Strawberries
Milk or Water 


Porter chopping broccoli.


Porter's sisters washed the strawberries while he cut them.

Everyone had decided that they wanted both cheese and ham in their "pockets"


Our finished dinner. 


Porter dished up the food on plates and Kelsey served everyone (which they thought was quite funny).


It was such a good meal! I am so proud that they did all of this (mostly) on their own. I was surprised how eager they were to do everything by themselves. On regular days their arms and legs don't work as well. It just goes to show, that when you turn things into a game, it becomes way more exciting.  

I loved doing this with my kids because they learned so many life skills while doing this. Here is a list of what they learned:
  • Grocery shopping
  • Picking the best produce
  • Knowing good meat from the bad meat
  • Looking for expiration dates
  • Washing produce
  • Setting a table
  • Cooking on a stove
  • Etiquette at the dinner table
  • Enjoying what each person is doing for the other
That's just to name a few.

I hope that your "restaurant" night with your kids is just as fun as mine was!


Saturday, February 22, 2014

Book Report in a Box

I would have to do book reports during my elementary years, and several times I had to find a way to be  "creative" while presenting my book.  My mom helped me make a type of "shadow box" for my report.  Inside of the box, (a shoe box works best) a scene is recreated from the book.  My mom is very artistic and amazing when it comes to this kind of stuff.  As you will see soon enough…I am lacking in this department. But whether you're an artist, have lots of time, little time, you're a mom on the go, or you just want something fun to do; I would highly recommend doing this activity.

My son recently read,  Inside Out, and Back Again by Thanhha Lai. The scene he wanted to make in the shoe box is of the main character standing by her favorite Papaya tree.


First take your box and add a hole to look through. You're going to want to check your "scene" as you go.


Cut a hole in the top of the lid to allow light into your box.  How much light you have is going to depend on how big you make the hole.  As you can see, I covered it with clear plastic wrap.  I like to color the plastic with a permanent marker to give the box a cool light inside.  Of course this hole is poorly cut.  I am sure you can do a better job!


Start decorating the inside of your box with whatever you want.  I painted the construction paper and glued it to the sides of the box to create a sunset.  Everything else is made of either tissue paper or card stock.  But don't stop there, the sky is the limit when gathering and using different materials.  I used a glue gun on some items (the tree in particular) but mostly used white glue.
With these types of boxes it is all about the detail. I tried to do perspective type angles and sizing while putting all of the pieces together. 


Here is what it looks like when you look through the hole.

I would suggest coving the underside of the lid of the box with paper (being careful not to cover up the ceiling hole) because it looks cleaner. 

Overall, my son and I had a lot of fun putting this together.  Something so simple got a lot of "oohs and ahhs" from his sisters and dad.  I am excited to see what my son's classmates have to say when he shows them his box.